Good custom hat design is not just put the logo in the middle and pray. Placement, cap shape, panel seams, decoration method and sample reviewall decide whether the final hat looks intentional or improvised. So before you pay for a sample, let's look at where artwork should actually sit.
Key takeaways
- The front panel is the highest-impact area for custom hat logos, but it also has the most construction limits.
- Small logos, side marks and back embroidery work best when they stay simple enough to read at cap scale.
- 3D puff, chenille, rhinestones and metallic pins need more spacing than flat artwork because they have physical depth.
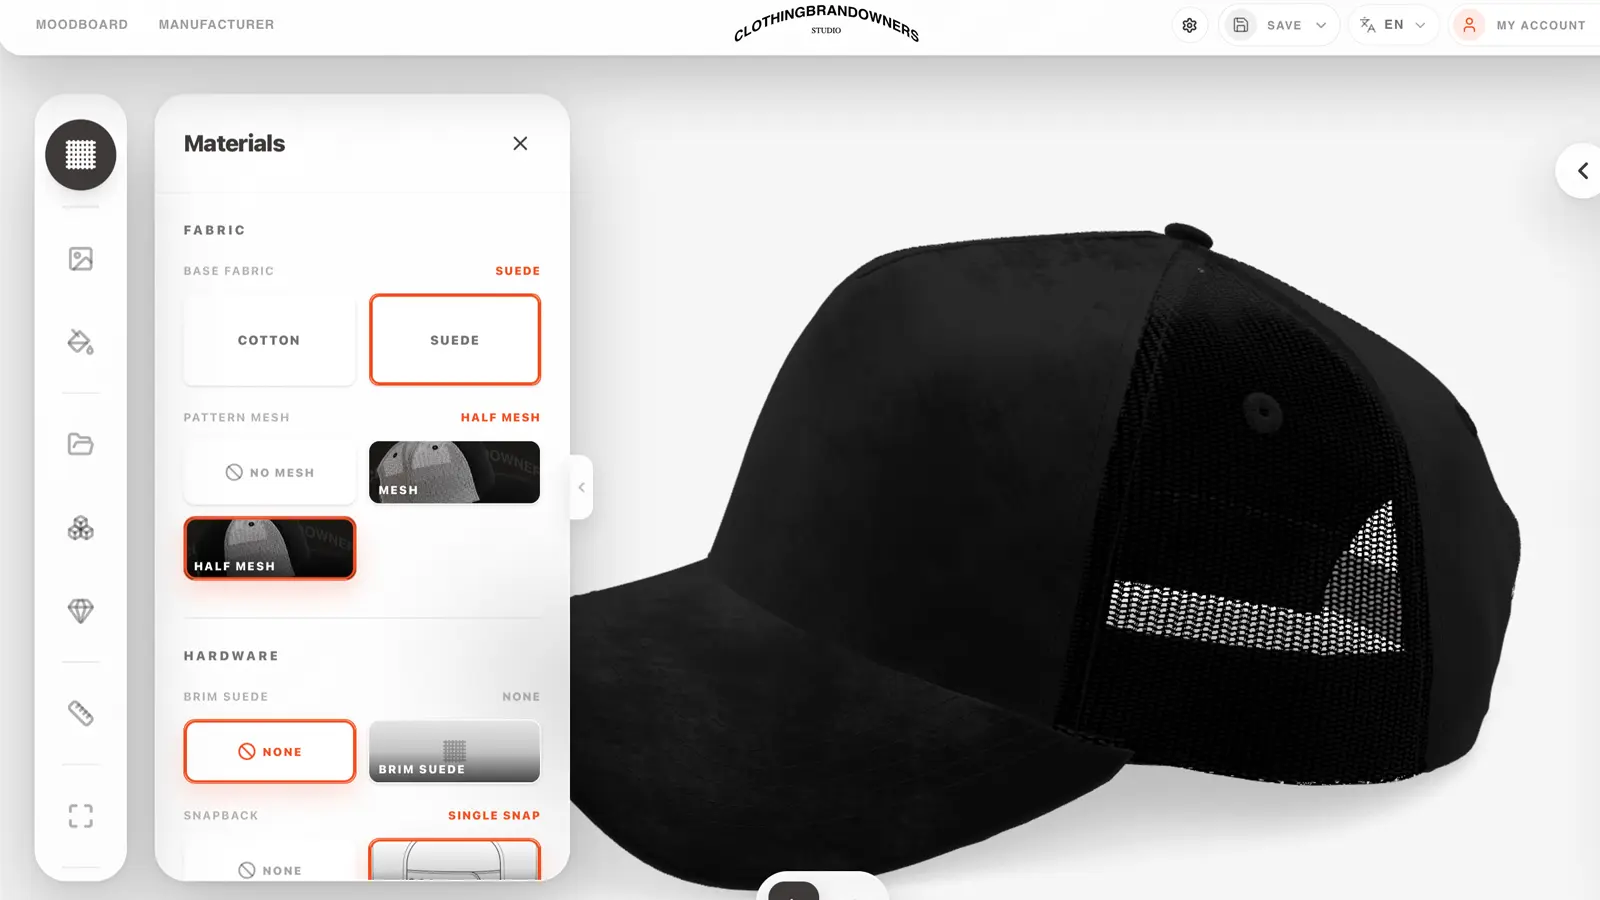
- A 3D preview helps catch placement, scale and material problems before paying for a physical sample.
Custom hat placement terminology
Before choosing where a logo goes, separate three things: design area, placement and decoration method. A flat mockup makes everything look easy. Then the real cap arrives with seams, curves, crown height and fabric behavior. Welcome to product design.
Design area
The design area is where artwork can realistically sit. Not where you wish it could sit. Common areas: front panel, side panel, back panel, brim top, under-brim and closure area.
Placement
Placement is the exact position inside that area. Same artwork file, different decision. A centered front logo, a small side mark and a lower brim graphic all need different scale and spacing. This is where beginners usually rush.
Decoration method
Decoration method is how the design becomes physical: flat embroidery, 3D puff, woven patch, leather patch, metallic pin, rhinestones or print. Each method has its own limits. The cap does not care how good the mockup looked.
Best custom hat design locations
Most custom hats need one primary front mark and one or two secondary details. That is usually enough. The best placement depends on whether the cap should feel minimal, retail-ready, promotional or statement-driven.
Start designing your custom hat with CBOs
Use the 2D editor to clean the artwork, then preview it on a real 3D cap before ordering a sample. Cheaper to move pixels than remake caps.
Open the 3D hat designerFront-panel logo placement
The front panel is where everyone looks first. It is usually the home for the main brand mark, collection logo, patch or 3D puff embroidery. The decision is not only what goes there. It is whether it should sit centered, slightly raised, oversized or patch-based.
Centered front logo
Centered logos work when symmetry matters. Wordmarks, simple icons and clean badge layouts usually read well here, especially on structured caps with enough crown height.
Patch placement
Woven, leather and rubber patches need breathing room. A patch that fills the whole front can look strong, but if the cap is too soft it can fight the panel curve or seam structure. The sample will show it immediately.
3D puff placement
3D puff works best with thick letters and bold shapes. Tiny text, thin outlines and complex detail are where puff starts suffering. If the artwork needs fine detail, flat embroidery or a woven patch is usually cleaner.
Side, back and brim placement
Secondary placements make a hat feel finished. A side mark adds identity without fighting the front logo. A back detail makes the product feel complete from more than one angle. Small details, big difference.
Side embroidery
Side embroidery should stay simple. Short text, small icons and drop-year details work better than detailed illustrations. If people need to read it from a distance, simplify it before sampling.
Back closure branding
The back can hold a small logo, website, size label concept or closure detail. But the closure controls everything: snapback, strapback, fitted and buckle closures all create different limits.
Brim and under-brim graphics
Brim details are good for hidden storytelling: contrast stitching, under-brim art, small text, signature marks or collection references. Just keep important artwork away from stitch rows and the strongest curve of the brim.
How to prepare artwork for sampling
Before moving to a physical sample, organize the artwork so production can understand it. The goal is not just make it look good. The goal is make it impossible to misunderstand.
- Keep logo files clean and high resolution.
- Separate front, side, back and brim artwork when possible.
- Name each placement clearly so the sample brief is easy to follow.
- Use 3D preview to check scale, spacing and relationship between details.
- Confirm whether each detail should be embroidery, patch, pin, rhinestone or print.
FAQ: custom hat design placement
Where should I place a logo on a custom hat?
Most custom hat logos work best on the front panel, either centered or slightly raised depending on the cap shape. Small secondary marks can work on the side, back closure area or brim.
Can I use the same placement for every cap style?
No. A 5-panel, A-frame trucker, dad hat and fitted cap all have different seams, crown height and panel structure. Placement should be reviewed on the exact cap style before sampling.
Is 3D puff good for small text?
Usually no. 3D puff works best for bold logos, thick letters and simple shapes. Small text, fine lines and detailed icons usually work better as flat embroidery, woven patches or printed details.
Should I design the hat in 2D or 3D first?
Start in 2D to prepare the logo, text and artwork. Then move into 3D to check how the design sits on the actual cap shape, panels, brim and side areas.
Does a 3D preview replace a physical sample?
No. A 3D preview helps clarify direction before sampling, but the physical sample is still needed to confirm fit, fabric feel, stitching, embroidery quality and final construction.
Conclusion
Custom hat placement is a production decision as much as a design decision. The right logo can still look wrong if it ignores seams, crown shape, decoration depth or cap style. Annoying, but true.
Start with clean artwork. Choose the cap style. Preview the design in 3D. Review the production limits before ordering a sample. That is the path. Simple, not always easy. But much better than guessing.
Design your own hat